Teacher Resources
Goodie Bag Ideas for the Classroom September 23 2010, 1 Comment
Goodie Bags are a low-cost way to connect with students and parents in your classroom throughout the year. Here are simple ideas and examples to help you create your own special Goodie Bags!Teaching Summer Safety May 13 2010, 1 Comment
The end of the school year is almost here! Here's a lesson plan, simple project and craft to help you teach your kids personal safety skills and how to play safe in the sun this summer.Free My Favorite Things Book August 14 2009, 0 Comments
Students will love creating and reading the My Favorite Things book. Appropriate for K-2 grades.

Materials:
- My Favorite Things printable template
- scissors
- pencils
- crayons
- stapler
Directions for Students:
- Cut out the My Favorite Things template.
- Staple the book together.
- Color the cover of the book.
- Write words and draw pictures to complete the sentences on each page.
- Read your book to your family and friends.

Easter Crafts for Young Children March 10 2009, 0 Comments
This Easter, why not introduce some new Easter-themed crafts into your classroom? Easter and springtime themed crafts are a real pick-me-up for the winter blahs, and they can really energize your room. Consider the following ideas for implementation in your own classroom:
Pop Bottle Baskets
To make this Easter craft, you’ll need the following materials:
- A two-liter pop bottle
- Scissors
- A hole punch
- Pipe cleaners
- Glue
- Tissue paper
- Craft paint (puffy paint works well)
- Stickers
- Cut off the top two-thirds of the pop bottle and throw out the top part.
- Punch two holes near the top edge, one on either side, to string the handle.
- Attach a pipe cleaner, or braid or twist multiple cleaners to make a handle.
- Glue tissue paper pieces to the bottle to make a multicolored design.
- Have your students further embellish the baskets with paint or stickers after they dry.
Handprint Easter Lilies
To make this Easter craft, you’ll need the following materials:
- Construction paper
- Pencil
- Scissors
- Pipe cleaners
- Glue
- Stapler
- Have your students trace their hands on the construction paper and cut them out (with or without assistance as appropriate).
- Take the construction paper handprint and curl the fingers around a pencil. Make sure to curl all of them in the same direction.
- Then roll the handprint into a cone with the fingertips curling out at the top.
- Glue the cone together and staple it to the pipe cleaner.
- Cut out some leaf shapes and staple them to the bottom of the pipe cleaner.
- Have your students make multiple lilies and tie them together with ribbon to make a bouquet.
Little Easter Lamb
To make this Easter craft, you’ll need the following materials:
- A popsicle stick
- Two clothespins with springs
- Black acrylic paint
- Glue
- Cotton balls
- A pair of wiggly eyes
- Paint the popsicle stick and the clothespins black and let them dry.
- Once dry, attach one clothespin to each end of the stick to form the lamb’s legs.
- Glue one large cotton ball to one end to form the head.
- Then glue cotton balls to the popsicle stick in between the clothespins to form the body.
- Glue a pair of wiggly eyes to the head. Depending on how tight the clothespins are, you may or may not want to glue them in place. Simply glue them in place on the paper.
Egg Magnets
To make this Easter craft, you’ll need the following materials:
- Styrofoam eggs or Styrofoam ovals
- Magnets
- Glue
- Construction paper
- String, yarn or ribbon
- Glitter
- If you have egg-shaped Styrofoam, you will need to cut it in half to give it a flat side to attach the magnet to. You can also avoid this problem by looking for flat oval shapes instead of eggs, or purchase one big flat piece and cut out the ovals in advance.
- Have the children glue the magnets to the back of their eggs and then decorate them. Some suggestions for decoration are to cut out Easter-themed shapes from construction paper and glue them to the eggs, make designs with string, yarn, or ribbon, or cover them with glitter.
Easter Crafts for Preschoolers and Kindergartners March 10 2009, 0 Comments
The Easter holiday offers a terrific opportunity to introduce some Easter and springtime themed crafts into your classroom. Consider the following suggestions to brighten up your preschool and kindergarten rooms and introduce some Easter cheer.
Rabbit Ears
To make this very simple Easter craft, you’ll need:
- Free Bunny Ears template
- Colored Construction Paper
- Two Straws (straight, not bendy straws)
- Glue
- Scissors
- Heavy Duty Craft Glue or Tape
- Depending on the age of the children, cut out a pair of rabbit ears and a pair of inner ears for each child or allow the children to cut out the pre-drawn shapes with assistance.
- Also cut out a long strip for a headband going horizontally across the forehead and around the back of the head.
- Help the children to glue the ends of their headband together, making sure that it fits snugly around the head and won’t fall off.
- Then glue the inner ears onto the outer ears. Attaching straws to the back of the ears helps to keep them upright, but white glue isn’t quite strong enough.
- You can use a heavy duty craft glue, tape or cut two small slits at the top and bottom of each ear and thread the straws through.
- Then glue or tape the ears to the headband.
Fingerprint Easter Egg Basket
To make this Easter craft, you’ll need:
- Free coloring page of an Easter basket
- Finger paint
- Crayons (optional)
- Print one copy of the free Easter basket coloring page for each student.
- Once the pages are colored, have the children dip their thumbs into the finger paint and use them to make “eggs” in the baskets.
- You can also turn this into a counting craft by instructing each child to make a certain number of eggs.
Candy Carrots
To make this Easter craft, you’ll need:
- Clear plastic icing bags
- Orange jelly beans or any other small orange candy
- Scissors
- Green tissue paper
- Twist ties
- Have the children fill an icing bag with candy, leaving space at the top to close the bag easily.
- Take two pre-cut squares of green tissue paper and assist them in grabbing the squares at the center and twisting them slightly to create leaf-like cones.
- Put the cones into the icing bag.
- Close the bag and wrap it with a twist tie.
Butterfly Pretzels
To make this Spring-themed craft, you’ll need the following materials:
- Cardstock or other heavy weight paper
- Crayons
- Glue
- Knotted and straight pretzels
- Have the children color a springtime outdoor picture.
- If you’re working with younger children, you may want to locate a coloring picture and glue it onto the cardstock to give them something to work with.
- For each butterfly, the children will need one straight pretzel to form the body and two knotted pretzels to form the wings.
Barefoot Chicks
To make this Easter craft, you’ll need the following materials:
- Construction paper
- Yellow tempera paint
- Markers or crayons
- Have the children remove their shoes and socks and help them cover the bottom of one foot with yellow paint. You can use a tub and have them step into it or apply the paint manually with a sponge.
- Assist the children in hopping over to the paper or put the paper down for them to stand on.
- Clean up the resulting mess and wait for the footprint to dry.
- Once dry, add a beak and feet to the chick.
- You can draw them on with markers or allow the children to glue on pre-cut shapes.
Spring Flower Craft for Children January 20 2009, 0 Comments
 Crafting is one of the best ways to get children to learn. Helping them to remember key points about a given lesson is far easier if you illustrate that with a hands on task. Making something delights the senses of nearly any child.
Creating their own small flower garden in an actual flower pot is a fast way to get them to understand what plants require to grow, and adding an extra little surprise makes it more fun along the way.
An Easter or springtime craft for pre-school or elementary aged children that is age appropriate and teaches them a little about how plants grow is perfect for elementary aged children.
The sunlight, as we know causes plants to grow and to flower and ultimately to create the foods that we use every day. This craft will fit well into teaching those lessons, or with beginning biology: production of plants, how the sunlight affects the earth or how food is produced.
This simple craft project is appropriate for elementary aged children as well as preschoolers and is a great way to spark some creativity in the classroom as well as to make learning about plant growth fun and interesting.
Materials Required:
- Small (one or two inch) terracotta pots
- Sheets of construction paper in varying colors, yellows reds and greens.
- A large bag of lollipops, that will permit two or three per child.(we used Dum Dum Pops)
- Safety Scissors, one pair per child.
- Florists clay or small pieces of styrofoam that will fit into the bottom of each pot.
- Glue sticks
Instructions to make the Spring flower craft:
- Each child will need two or three different colors of construction paper.
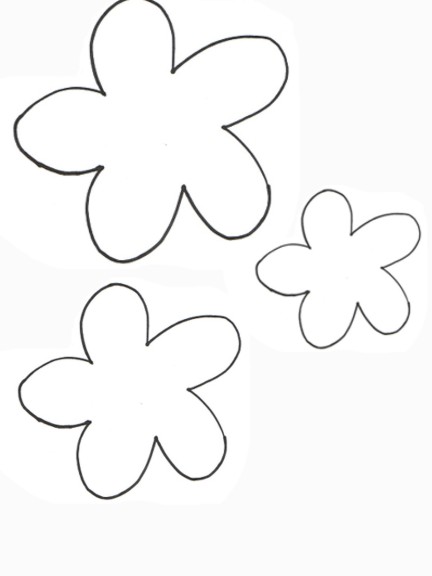
- You will need to cut flowers in three graduated sizes as the templates show.
- Cut three of each size of flower and the teacher will need to poke a small hole in the center of each flower .
- Layer a small flower, a medium sized one and a large flower on each stick making three layers of "petals".
- The middle of each flower will be the lollipop, which is part of what makes the project a bit more fun.
- The leaves will require a dot of glue to stick to the sticks of the lollipops.
- Situate a block of florist foam in the bottom of each pot and stick the lollipop stick into the foam to hold the flowers upright.